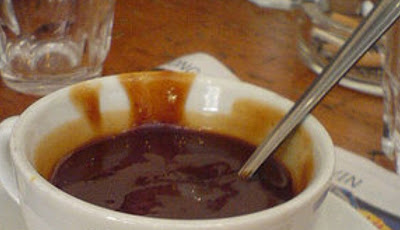
Imbuljuta


Mulled wine seems to be sprouting at every Christmas market or event these days. Mulled wine is a warm, spiced wine drink served originally served in colder counties such as England. Other countries on mainland Europe have their own versions of the drink such as the Nordic Glogg or the German Gluewein. Click here for my mulled wine recipe

But to take us back to the Maltese tradition, this week I am giving you the recipe for the imbuljuta which is a drink made with chestnuts traditionally served over Christmas.

This drink is best served piping hot! Here is what you will need:
400 g dried chestnuts
150 g sugar
50g drinking chocolate
1 orange zest grated
1 tangerine peel finely chopped

Start off by washing your chestnuts a couple of times always discarding the water after every wash. Now place them in a bowl and cover with water again and allow the chestnuts to soak overnight.

Once you are ready to cook and serve your imbuljuta, place the chestnut and the water that they have been soaking in into a large pot and add the other ingredients. Simmer gently over a low heat until the chestnuts and nicely softened.

Imbuljuta is served in cups or mugs with or without the chestnuts depending on your personal taste.

This drink or dessert can also be served at tea time, it is quite filling, so beware!
Finally I would like to wish you and your families a peaceful Christmas and a happy New Year!

Canape for your Festive Meal

With only a few weeks left to Christmas, here are some ideas for to prepare for your festive meal. But before I start this week’s recipe, I would like to remind you about the Christmas Market which is on this Sunday, 23rd November, at San Anton School Imelliet, L/O Mgarr.


You’ll find everything you want for the perfect Christmas, from traditional decorations, to gift wrapping, home-made jams as well as stocking fillers to impress your family and friends. Whilst you shop, the children can meet Santa or take part in one of the numerous activities such as story telling or Christmas crafts. The market is open all day from 10.30am till 8pm.

And now back to our recipe. When preparing your festive meal this year, why not start off with some impressive canapé . These delicious nibbles will keep your guest’s appetites at bay and at the same time it is an opportunity to get the conversation going.


And whilst they are chatting about the weather, you are comfortably left with some extra time for the final arrangements before greeting them and inviting everyone to have a seat!
These canapé can be prepared in advance and assembled on the morning.

You will need 1 long baguette - possibly a day or 2 old!
The day before, cut the baguette into slices. Cut slightly on the diagonal to make larger slices. Grill the bread on both sides until it has toasted, possibly under an oven grill. Once the slices have cooled, place them in an air-tight container and keep until you are ready to use them.

Crabmeat pate
1 tin x 400g crab meat
2 tablespoons good quality mayonnaise
Half a lemon grated
Freshly ground pepper

Place the crab meat into a bowl and mash it with a fork. Add the lemon zest and the pepper, then stir in the mayonnaise. Now taste the pate and season according to your taste buds. The pate should drop once scooped with a spoon but it should not be too runny. Place the pate in the fridge.


Mushroom and blue cheese
200g fresh mushrooms finely chopped
2 garlic cloves
50g blue cheese

Chop mushrooms and garlic finely and cook over a medium heat until the mushrooms are done and all the liquid has been absorbed. Now place the mushrooms in a bowl and allow them to cool completely. One the mushrooms are cold, add the blue cheese which also needs to be chopped finely. Place the pate into a bowl and refrigerate until you are ready to use.

When you are ready to serve the canapé, place a small amount of pate on one end of the baguette slice. Mix the different pates on the same plate so that you will serve a selection. This selection of canapé will take just minutes to assemble on the day.
This article has been previously published in the Best Buy Supplement, out monthly with The Times

Pork Fillet with Home-made Chips


Christmas is getting closer and with most Christmas publications finalising this week, I’ve been pretty busy preparing delicious Christmas treats for you to enjoy making over the Festive season.

This weed I would like to mention the Christmas Market that will be held at San Anton School, Imselliet (limits of Mgarr) on Sunday 23rd November. You’ll find everything you need for the perfect Christmas, from traditional decorations to gift wrapping, home-made jams and also stocking fillers. So make a note in your diaries. The market is open from 10.30am to 8pm.
And since we are only 6 weeks away from Christmas and from the big Christmas lunch here is a quick family meal you can prepare in minutes!
Pork fillet is one of the leanest cuts of pork you can buy. It is also not expensive and even though cooking meat might sound inhibiting for mid-week suppers, this dish needs very little time to prepare.

When you buy a pork fillet you buy a whole one and this is usually about 30cm long (on average). You can cook your fillet whole in a pan however this would take some time and a lot of care since the fillet would need continuous turned – definitely not ideal for a mid-week supper.
The method I use in this recipe is to cut the fillet and hence reduce its cooking time. Here is what you need for this pork supper for 2:
1 pork fillet
2 medium sized potatoes
Start off by preparing the fillet. Trim any excess fats from the outer part of the fillet taking off as much as you can. Next cut the fillet into thick strips around 5-7 cm each. Now turn the fillet over so that the cut would be the top or bottom and using a kitchen mallet beat the meat slightly.
This way you will spread your fillet out into a wider and flatter piece of meat. Keep on doing this until all the fillet has been cut and beaten.
Next, place all the cuts in a plate and sprinkle with some salt and pepper, set aside in the fridge until you are ready to use. This can be prepared a couple of hours in advance.
Now wash the potatoes still with their skins on and cut them in half, now cut each half into wedges and place them on an oiled baking dish. You can sprinkle them with salt or any type of spice. You can make some with paprika or curry should you prefer.
Now place the chips into a hot oven. This would have to be pre-heated to 170C. Cook the chips for about 30 – 40 minutes or until your chips are golden on the outside and soft on the inside.

Serve your chips as soon as they are out of the oven.
To cook your fillet, warm up a non-stick pan WITHOUT any oil or fats you can also use a griddle pan. Once the pan is hot enough, place the fillet pieces into the pan making sure that they do not touch each other. If the pieces of pork touch each other, then they will cook into one whole piece.
Once your pork is cooked through, serve your fillet with the chips or add some fresh salad or hot vegetables!

Quick Apple Pie

This week has finally seen the start of some winter weather. This is good news for people, who like me, love to bake. Working with a hot oven in a cold day has a special feel to it!

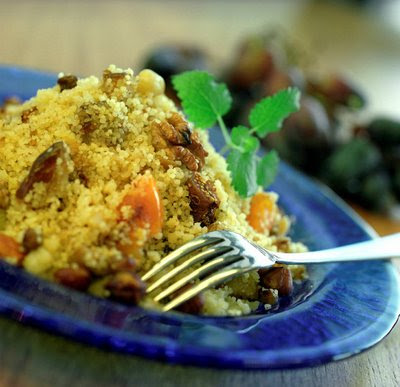

Next week, 11th November is St. Martin’s day so make sure you keep this local tradition alive by preparing the Traditional Borza ta’ San Martin for your little ones. A tiny cloth bag with a draw string at the top containing nuts, figs, 1 orange and 1 apple and if available 1 pomegranate.


This bag used to be carried around during the feast of St. Martins and children used to play “ zewg jew fart” meaning even or odd. Through this game you could win more nuts from other children’s bags or lose their own little stash!


So, if you are planning a St. Martin’s picnic this weekend or simply want something quick to enjoy with your afternoon teas, here is a recipe for a super fast apple pie. The pie is as easily adaptable for your weekend dinner parties so don’t treat this apple pie as inferior dessert simply because it is easy to make!

Here is what you need to make this week’s quick apple pie.
400g Sweet pastry.
2 apples
2 eggs
½ cup sugar
1 tsp vanilla essence
60g ground almonds


Start off by rolling out the pastry and place it in a flan dish to rest. In the mean time prepare the filling. Peel one of the apple – no need to core it. Grate the apple and place it in a bowl together with the eggs, almonds and vanilla.


Now go back to your flan dish. The pastry would have relaxed by now and you will be able to remove any extra trimming from the side. Once that is done, spread the filling over the base. Now wash your second apple cut it in half and keeping the skin on, slice it into thin slices. Now place the slices around the edge of the pie leaving a hole in the middle where the filling is still showing.


Bake the apple pie at 160C for about 20 mins. I’m sure you will never manage to do a dessert in less time than this!

Pomegranate Flan


Pomegranates are in full season now and found on sale in most shops and supermarkets. Until recently, this fruit was discarded as unwanted crops from trees and given away to neighbours and friends in abundance.

It is only recently that we have begun to realise the importance of this fruit and the antioxidant that they carry. A number of recent studies suggest that pomegranates may be beneficial in preventing a variety of potentially deadly diseases, including heart disease and cancer.
The word, pomegranate, is derived from French, pomme garnete, literally means seeded apple. Both tart and sweet, the pomegranate seeds and their pulp are the edible portion of the delicious fruit.

Eating this delicious fruit need not be a laborious process of trying to peel off the seeds without piercing them, a chore which would usually take up a good part of your morning! Try cutting the fruit in half, just like you would do with an orange, and squeeze the juice out with a standard orange squeezer. The seeds will remain in the top part of the squeezer, just like the pulp from an orange would, and you are left with the pomegranate juice to drink and enjoy.

Pomegranates can be enjoyed as part of a sweet or even sprinkled over a salad. Try keeping some for Halloween night and use them as small eye balls or pile them up to look like spooky body parts.

400g sweet pastry
2 large pomegranates
200ml sparking wine
3 egg yolks
30g corn flour
80g sugar
Candied orange peel

Split your pomegranates open and take some of the seeds out with your hands and set those aside for decoration. Squeeze the remaining fruit and place the strained juice it in a thick bottomed pan. Add the wine and the corn flour. In a small bowl beat the egg yolks and the sugar to a smooth cream and add the cream to the pomegranate juice.

Allow your mixture to cook over low heat until the cream thickens. Switch the heat off and add the orange peel which needs to be chopped finely

Once your pomegranate cream is ready, line a small flan dish with the pastry and pour the sauce in. bake the flan in a pre-heated oven at about 160C for 30 minutes. Make sure that your pastry is not too brown but just has a nice golden colour.

Once your flan has cooled, sprinkle some icing sugar and top with the pomegranate seeds which you have set aside.

Low fat loaded potato


When watching my food intake, I sometimes feel fed up of tuna salads for lunch! With summer over, we now start gearing up for Christmas and even though we won’t be in our bikinis, most of us will still want to look our best on this occasion.


This week I shall be giving you the recipe for a delicious and healthy loaded potato. One of those you see in shops full of cream and dripping from the sides…but without all that saturated fat!

So here is what you need to make 2 potatoes


2 medium sized potatoes, washed
1 pot of plain yoghurt
4 rashers of bacon


Start off by draining the plain yoghurt. Place a piece on muslin over a bowl, hold it down with some pegs and pour the yoghurt in. Allow it to drip for at least 1 hour. Alternatively, you can buy some greek yoghurt.


Now, once you are ready to serve your plate, place potato in the microwave and cook it for about 7 minutes or until your potato is done. You can check this by inserting a knife, if it is soft on the inside, then your potato is done.


Now, if you have a grill option on your microwave, change the setting to grill and cook it for another 3 to 4 minutes.


Make diagonal cuts against each other on the top of the potato to form a V and remove part of the top. Once removed this will look like a triangle, set it aside and keep.


Now grill your bacon and cut it into small cubes and mix it with the yoghurt. Place the mixture on top of the potato and cover it with the triangle you have removed and serve.

Moroccan Style Couscous


Couscous is North Africa’s answer to pasta. A staple food in these countries that requires very little preparation and not a lot of utensils to have it cooked. In view of this, couscous had become the ideal food for the nomadic people but was also prepared by other tribes.


With in increase in different grains being introduced in our diets, couscous found it’s way in our European dishes along side others like quinoa, barley and various kinds of rice. But unlike many of these, couscous is very easy to prepare and is now available in most supermarkets and on various restaurant menus.


Couscous can be used as a substitute to potatoes, as a side-dish or as a plate on it’s own.

Couscous is very versatile as it can be eaten plain or mixed with various spices, meats and sauces.


In morocco, where couscous is a daily staple, this is never served cold but it is served with stews and other hot dishes. Also, there are number of households that still prepare their couscous from scratch this takes hours of preparation. We are used to the instant couscous that is ready in 5 minutes or less and this is one of the main reasons why couscous has become so popular in meals today.


Here is what you need to make this morrocan style couscous which can be eaten as a meal or served as part of a buffet.
250g Couscous
2 teaspoons Coriander paste
200ml Chicken stock – warmed
1 tin Chickpeas
2 small marrows – diced
Walnut oil
Walnut Pieces


Start off by placing the couscous in a large bowl. Now add the hot stock and cover the bowl with a plate. Let the couscous rest until the stock has been absorbed.


Now using a fork and NOT a spoon, stir the couscous until it fluffs up. Next add the coriander and again mix it in using a fork. Now stir in the marrows which are raw and the chickpeas.
Should you be serving the couscous in a different bowl, change your bowl at this stage. Now drizzle a generous helping of walnut oil and top with walnut pieces. Walnut oil can be found in Marks & Spencer food section.


This dish can be served warm or cold as part of a summer buffet.

Fresh Tomatoes


Tomatoes are plentiful at the moment and hence relatively cheap. This is the best time to stock up on some fresh produce and preserve it for the colder months.
Tomatoes are great to work with as they cook easily and do not require a lot of preparation.
You can preserve your tomatoes as a plain tomato sauce and use them instead of the tinned ones in the colder months. Alternatively you could turn the tomatoes into jam.
This week I shall give you 2 recipes; this first recipe is for preserve the tomatoes into jars and the other for a fresh and light pasta sauce.
To best preserve your tomatoes, I like to peel them and chop the roughly. Now place them alone in a pan. Do not add any oil, onion or garlic and allow them to simmer. Once the tomatoes have softened and achieved the consistency of tomato polpa (tinned tomatoes) place them into sterilised jars, label and store in a cool place.

There are 2 basic methods of sterilising:
Oven Sterilisation: Wash your jars with warm soapy water and rinse and dry them thoroughly. Now place the jars for 5 minutes in a hot oven (around 180C) just before filling up. Once the jars are out of the oven, fill immediately and seal. Allow the jars to cool before labelling or storing.

Pot Sterilisation: Wash your jars as above, and dry them. Fill the jars and close them. Now place a dish cloth around the jars and carefully place them in a large deep pot so that the jars are about 5 cm lower than the edge of the pot. Fill the pot up with boiling water until the jars are immersed half way up. Bring the water to a boil and keep them boiling for about 20 minutes. Turn the heat off and let the jars cool completely inside the pot before removing them. Once the water has cooled, wipe the jars dry from the outside, label and store.

Should you have a steam baby bottle steriliser, this too can be used to sterilise your jars. Just wash the jars as above and place them in the steriliser. Once the jars and lids are sterile and still hot, fill them with your jam/chutney and cool completely before labelling and storing.

Spaghetti with fresh lampuki


This is a new way of using the Lampuki fish that are in season. Lampuki, (Dolphin fish or Mahi-mahi) are mainly fried into chunks locally or made into a pie. Click here for my Lampuki Pie recipe
This week I am giving you a different recipe for your lampuki, Pasta with lampuki. This pasta is easy to prepare and also very healthy.
You can also try this dish with swordfish should lampuki not be in season. This is what you will need to make enough sauce for 500g of pasta:

1 large lampuka just under 1Kg
olive oil
4 cloves of garlic
fresh herbs, parsley, thyme, mint, basil
4 large plum tomatoes (tadam cat)
500 grms cooked pasta

This sauce will be ready by the time you cook your pasta so place a pot of salted water over the cooker and in the meantime start preparing the sauce.


Start off by cleaning the fish and cooking it slightly under the grill or steam it. Once the fish has softened slightly and are nearly cooked cut the fish into fillets. The easiest way to do this is to use 2 spoons; remove the head, tail and spines and chop the fish into bite size cubes.


Make sure that the fish isn’t too small otherwise it will crumble on cooking.
Now heat some olive oil in a pan and add the garlic which needs to be chopped finely. Next add the chopped herbs and the peeled chopped fresh tomatoes.


Simmer for about 5 to 10 minutes and once the pasta is nearly done, add the lampuki chunks.
Stir the cooked spaghetti into the sauce and serve immediately.

Lampuki (Mahi mahi) Pie

Lampuki are back in season this month! With every purchase I made over the past week the fish seem to be getting larger so it will soon be time to prepare some delicious Lampuki pies.
Lampuki is the Maltese name for Dolphin fish or Mahi-mahi. This fish is considered by some as the only fish during these months as it can be found in abundance at most fishmongers and is also sold by hawkers parking close to home.
Most families like to remove head and tail, then cut into thick chunks, dust the pieces with some flour and fry them in oil. This typical maltese supper is served it with some crusty Maltese bread, boiled potatoes and some kunserva (tomato paste).

Here is what you need for the pie

2 onions
Lampuki fillets chopped – Number depends on the how full you like your pies
400g Spinach leaves (you can use frozen)
1 large tin of peas
1 tin of chopped tomatoes
100g green pitted olives
Chicken or Fish stock – about 250ml
Short crust pastry about 500g – depends on the size of your pies
Start off by frying the sliced onion in a little oil until it is softened. Next add the tomatoes, the spinach and some of the stock.
Now add olives and the peas and stir. Add more stock if it is required. Finally add the fish fillets and gently stir the pot so as not to break your fish chunks.
Allow the pot to simmer for a couple of minutes until your fish is cooked.
It is important that the filling is completely cooled before making you pies. It is best to make the filling a day ahead and rest it in the refrigerator.
To prepare the pies, grease your baking dish and line it with the rolled out pastry. Pour your cooled filling in the dish and spread it around evenly. Make sure that there is no water in the filling at this point. Now cover the pie with some more pastry and bake in a preheated oven at 180C until nice and brown! This should take about 45 minutes depending on your oven.

Tomato Pie


Pies are the ultimate home-made take-away. Since most pies can be prepared ahead of time and eaten warm or cold, this convenience food is ideal to pack away for school or and office packed lunch.

With busy winter schedules just around the corner, over the next couple of weeks I shall be giving you some recipes for you to enjoy. And even if your days are still not busy, you can prepare these pies to take with you on the beach or a picnic.

For the pastry
150g flour
2 tablespoons olive oil
1 cup of water
Pinch of salt
Pinch of sugar

For the Filling
1 kg tomatoes
Fresh Basil leaves
Olive oil
1 teaspoon sugar

Start off by making the pastry. Place the flour, sugar, salt and olive oil in a blender and pulse until the oil is properly mixed into the flour. Now, with the machine running add the water, a little at a time, until your flour turns into dough.

Topple the dough on a lightly floured surface and knead into a ball. Allow the pastry to rest for about 30 minutes at room temperature.

In the mean time, wash your tomatoes and slice them into 0.5cm slices.

Roll your pasty out and place it in a round baking dish of about 23cm. Blind bake your pastry in a preheated oven for about 10 minutes at 160C. Place piece of foil, shinny side down, on the pastry and weigh it down with baking beans of some coins. Spread them evenly so that your pastry will not rise.

Once your pastry is cooked, switch the cooker onto the grill setting.
Take the pastry out of the oven and keeping it still in the dish place the tomatoes in it. Sprinkle the tomatoes with the sugar and some freshly ground pepper and grill for 8 minutes or until your tomatoes start to crunch up.


Remove the pie from under the grill and drizzle with a generous helping of olive oil and fresh basil leaves.

Mushroom Risotto - Risotto ai funghi porcini


Rice is cultivated commercially in the Po Valley, the northern part of Italy where it has the perfect environment and climate: flat lands, abundance of water, and humidity. Risotto is an Italian dish and is quite popular all over Italy with the different regions having their own specialties.

Risotto Milanese, very popular in Milan (as the name suggests) and the rest of the Lombardia region, is said to go as far back as 1574 when the Duomo di Milano was being built. The stained glass window paint seemed to have been tainted with saffron to obtain a more brilliant color. So much fuss was made about the colour that in one of the banquets, saffron was added to the rice to make it look like the stained glass. The rice was so good that the saffron became a staple addition.

I like preparing risotto for dinner since it is a one-pot dish. All you need to do is prepare your ingredients and add them at the right time! Here is what you need to make risotto ai funghi porcini:

250g Italian Risotto Rice such as Arborio or carnaroli
About 50g of dried Porcini Mushrooms
1 ½ cups full bodied Italian Red wine, chicken Stock
1 medium onion - sliced
1 handful of fresh parsley – chopped
2 tablespoons of Olive oil
Salt and pepper to taste


Start off by soaking the funghi in some hot water and let them soak until the mushrooms have softened.


Now, in a pot or a wok, fry the onion in the olive oil and once it has softened, add the rice (raw) and stir. Coat the rice with the oil and start adding the stock a little at a time until the rice starts to soften, it is best to use a ladle or a little jug to calculate how much stock you are adding. It is important that the stock is completely absorbed before adding any more.


Add the wine to the rice and once the rice is nearly done, add the drained mushrooms.

When you are draining the mushrooms, reserve the water and straining it through a fine sieve and add the water to the rice. Again it is important that any liquid is absorbed before adding any more.
Finely add the chopped parsley and serve immediately.

Marrow & Feta Cakes

The marrows in my garden are taking it somewhat easy this year! I’ve been having lots of flowers and very few marrows. Marrows will grow in your gardens or pots quite easily. All you need are some seeds and plenty of water and sun. Marrows however, are quite cheap and abundant at this time of year in most green grocers.

Having had my dose of BBQs and carbs this month, I decided to try something different for dinner. Here are my marrow and feta cakes, they are delicious as a snack, in a sandwich or as a main course accompanied by a nice salad.

Here is what you need to make about 10 little cakes
500g marrows – grated
200g feta cheese - chopped
Extra Virgin Olive oil
Fresh mint leaves
Black olives – Optional
1 egg

Start off by draining the grated marrows. Place them in a colander and sprinkle some salt over them, now allow them to drip for at least 30 minutes.


Once the marrows are drained, place them in a bowl together with the feta cheese, mix them together using a fork so that you can mash the feta cheese when needed.
Add the other ingredients one at a time mixing well after each addition.
You can dry fry these cakes in a non-stick pan or else fry them in a little oil.

Serve these warm as part of a meal or cold as a snack. These cakes can also be prepared ahead and stored in the fridge till you are ready to use them. Consume within 3 days.

Fresh Basil Pesto


Over this weekend I was getting a warm fuzzy feeling that tricked me into thinking that I am not in the middle of August but in some splendid March sunny day, when the days just start warming up but you still can stand being in the sun for more than 15 minutes.

As with most things, my state of mind will effect my cooking and so this week I started adding some baked dishes in my lunch/supper menu. Being nice and breezy gives me the peace of mind that I can spend some extra time in the kitchen and not cook the quickest simplest dish to get out of the firey heat.

So this week, I prepared one of my daughter’s favorite pasta sauces, fresh pesto. Pesto is an Italian sauce which is prepared differently in the different regions. The variations on the basic recipe all depend on what is abundant in that region. Pesto Siciliano for example has tomatoes whilst pesto Genovese has lots of basil.

Pesto Genovese is probably the most know and the most consumed, now produced in large amounts commercially, most of us just keep a handy jar in the store cupboard (which keeps for months) for that quick plate of pasta!

There is more that one can use pesto for besides as a pasta condiment, my husband uses it as part of his secret chicken marinade, you can also use it as part of your salad dressings.

The basil in my garden is pretty abundant at the moment so preparing this sauce came pretty easy. Basil grows easily in pot or window boxes and can be grown from seeds. You can also buy little seedlings from most garden nurseries and replant at home into a larger pot.

The proper Genovese Pesto is made with pine nuts, however these are pretty expensive locally. If you wish to substitute the pine nuts, I suggest using walnuts or even almonds. Don’t forget pesto is a thick sauce so a little bit of sauce will take you a long way. Here is what you need


200 gr. Pine nuts
1 large bunch of fresh basil leaves – remove all stalks
Extra Virgin Olive Oil – the best you can afford
Grated Parmesan Cheese.

Place the basil leaves and nuts in a food processor and with the motor running drizzle enough olive oil to create a paste. Add the cheese and taste. Do not add any salt or pepper, however, if required, add some more cheese. It is important to blend well after each addition. If you have made too much pesto to consume all in one go, place the extra amount in a sterilized jar and top with more olive oil so that all the pesto is covered with oil.

Pesto will keep for 1 week but is best consumed fresh.

Boxed Wine from Italy

I have just come across this article about good wines being sold in boxes and even though I completely agree with the author saying that I would not be seen with a box of wine sitting on my dinner table, environmentally and economically it probably is more feasable!

The barbarians are not literally at the gate, but Italy is under some duress, judging by the headlines of the last 24 hours or so.
Thousands of soldiers have been deployed in the streets of Rome, Milan, Turin and Palermo to battle street crime and protect historic sites like the Duomo. Meanwhile, the government is cutting spending as the country absorbs a share of the world’s economic troubles. And “Time Uncovering Truth,” a painting by Italian rococo master Giambattista Tiepolo that hangs in the press room of Prime Minister Silvio Berlusconi’s official palace, has been altered to cover a bare breast.
As the nation stood at the top of several potential slippery slopes at once, yet another one emerged this afternoon. The government has decided to tolerate something that wine-worshipping Etruscan poets never dreamed of. From Bloomberg News:
Italy’s Agriculture Ministry said that some fine Italian wines that receive government quality guarantees will be allowed to be sold in boxes.

BBQ sauce


Outdoor entertaining is a preferred option at the moment and what better way to share good food in good company then to have a BBQ. Here is a recipe you can add to your BBQ repertoire to make it a little more exciting; BBQ sauce.

This is my version of making BBQ sauce. Even though there are different brands available in most supermarkets, home made sauce always has a different taste. Preparation of this sauce might be ideal to delegate to the younger members of the family to keep them occupied till it is time to eat. You can use this sauce as a dipping sauce or even to baste you meats whilst cooking.

Here is what you will need:

1 large onion
½ green pepper
1 chilli pepper
1 teaspoon mustard
2 tablespoons vinegar
salt
few drops of Tabasco – depending on how spicy you like your sauce
1 tablespoon Worcestershire sauce
4 tablespoons oil
4 tablespoons red wine

Place all the ingredients in a blender and whiz until the vegetables have been cut into very small pieces and the other sauces have amalgamated. It is important not to use olive oil in this recipe since its taste will be over powering, a flavour-less oil, such as canola would be better.

The mustard could be French or English, this depends on your preferred tastes I prefer using English.

This sauce can be prepared a couple of hours before being served. Allowing the sauce to set will help the different tastes to come together. BBQ sauce can be used as a dipping sauce for you meats, but can also be used to baste your chicken, beef or even pork.

This recipe has been previouly published in the E&D magazine (July, 08 Issue), out with The Times

Very Fruity Cups


Serving these cups as dessert makes a great end to any meal especially if it is served on one of our balmy summer nights. These cups are very fresh and best of all can be prepared in advance and stored in the fridge until you are ready to serve.

I made mine with whipped fresh cream however, if you prefer you can substitute this with vanilla ice-cream. If you are using ice-cream however, you will need to assemble the cups exactly before serving as the ice-cream will start to melt.

You will need 1 cup per guest; here are the ingredients to need to make 4 cups:
1 tub x 180ml fresh cream
M&S fresh Vanilla pods
1 tin M&S Mango Slices
1 packet M&S Organic rhubarb & ginger cookies
1 packet M&S Cranberry Delight
1 bar Sao Tome Dark Chocolate with cocoa nibs, from M&S
M&S Pure Canadian Maple Syrup

Start off by placing the un-whipped cream in a bowl. Now slit the vanilla pods lengthwise and scrape out the vanilla seeds. Place the vanilla in the cream and allow it to set for a couple of hours. If you are using 1 tub of fresh cream only use 1 vanilla pod. The tube contains 2 pods, so you can pack the other pod back in its tube for.

Once the cream is all speckled with the vanilla seeds, whip the cream until thick. Now assemble your cups.

Place some cream at the bottom of each cup, then add a layer of biscuits which need to be broken roughly with your hands before adding. Add some more cream on top. Now place a layer of mango slices to completely cover the cream, next place a tablespoon of cream in the middle of the slices and top with shavings of chocolate. Sprinkle the cranberries over the whole cup and finally drizzle some maple syrup. Refrigerate these cups until you are ready to serve.

The cranberry delights are great snacks to nibble on, make sure to eat the yogurt coated cranberries and use the uncoated ones for the dessert above.

Sao Tome chocolate has 75% cocoa solids so will be quite hard. Try shaving the chocolate with a sharp knife of using a peeler.

This article has been previously published in the Best Buy Supplement, out monthly with The Times.

Quick Green Prawn Curry


This green curry will be ready before your rice is cooked. Try making this as a dinner for 1 or for friends. You can serve this with rice or noodles. I used M&S organic brown rice. If you like to buy organic ingredients, then M&S is the place for you. Their organic products range from 5 minute marinades to biscuits and pulses!


Here is what you need to make enough for 1
2 tablespoons Thai Green Curry Paste
1 packet M&S Honduran King Prawns
M&S Organic Brown Rice
1 tablespoon M&S Creamed coconut
1 medium onion – finely chopped
50g baby Corn


Start by boiling some water for the rice to cook in. Next place 1 teaspoon of the creamed coconut into a little bowl and add about ½ a cup of boiling water. Stir the cream until it is completely diluted.

Now, in a pan, fry the onion in a little oil and once the onion starts to sizzle, stir in the curry paste. You can add more past if you wish to have a spicier dish, however 2 tablespoons will give you a nice spicy dish

Once the paste and the onions start cooking together, add the creamed coconut which has been diluted. Add the corn which needs to be cut roughly into smaller pieces and stir. Allow the dish to simmer for about 5 minutes, then when the excess liquid has been absorbed, stir in the prawns and switch the heat off.


At this point your rice should be cooked and strained. Place your rice in a plate and spoon the prawn curry over it, sprinkle with some chopped coriander and serve.

This recipe has been previously published on the Best Buy Supplement, out monthly with The Times.
Should you like to contact me, please do so on concita@demicoli.com

M&S...again


Just finished the photoshoot for the Best Buy Supplement for July. Mmmm... simply delicious, after the photographer leaves I have to clear up the plates, from the food I mean and not the table!


Most impressive ingredient this time round I guess are the rhubarb & ginger biscuits and the vanilla pods. The biscuits are crunhy on the outside but chewy on the inside and the vanilla is something out of this world. Nothing compared with the cheap little glass bottles we are accustomed to!.. this is the real McCoy.


So watch out for the recipes in the Best Buy Supplement, out with the Times on Wednesday 9th July.

Stuffed Marrows (Qarabali Mimmli)


With Summer officially starting last Saturday, we're in for weeks of sun and hopefully clean clear seas! Most school children also finish their scholastic years this weeks so with temperatures up and little time on our hands to prepare meals, this is the time of year that I like to prepare meals such as qarabali mimmli or timpana.
Even though they might sound heavy for these hot days, these dishes are ideal as they can be prepared in advance and also they can be easily packed away for the beach.

Marrows are quite cheap and abundant at the moment, so here is the recipe for stuffed marrows, Qarabali mimmli; here is what you need :
3 marrows - long
1 small tin corned beef
200g Minced beef
1 Egg
Grated cheese
2 rashers of back bacon
1 clove of garlic – finely chopped
Salt, pepper, parsley for seasoning

Start off by washing the marrows and chopping off the tips from the top and bottom. Now cut them open into 2 pieces, cut them lengthwise and scoop out some of the flesh. Place them in a greased baking tray and set aside.

Now in a clean bowl, place the corned beef and mash it properly with a fork, add the minced beef and mix well. Now add all the other ingredients and mix properly. Place the filling into the marrows and bake in a preheated oven at 160C for about 35 mins or until your beef is cooked through.

This dish is best served with an accompaniment of Maltese baked potatoes ( the recipe for this dish I shall be giving you over the next weeks) and some Maltese bread.
Should you like to contact me, please do so on concita@demicoli.com or leave your comments on this page.

Lamb's Lettuce


Lamb's lettuce is a salad green which grows in a rosette of long spoon shaped leaves which may also be clustered in loose heads. Lamb's lettuce is used in salad mixes together with other greens such as rocket, frisee or any other type of salad leaves.

The name comes from the fact that the leaves resemble in size and shape a lamb's tongue!). This type of lettuce is usually sold bunched together with its roots which are best kept intact until you are ready to use it.

Place the roots in a little water and store it in the fridge, this way the lettuce will keep for days. As a salad green, it is more expensive than the standard cos (hass twil) or iceberg (kabbucjat) that we are accustomed to buying, however, it is a nice variation to your salad dishes.


Here is what you need to make a lamb’s lettuce salad for 2:
1 Lambs lettuce
4 slices back bacon
1 chicken breast
3 garlic
1 sprig of rosemary
Some mushrooms
2 slices stale bread.


Start off by cutting the bread into little cubes. Cut the bread vertically and horizontally so that you have 4 pieces, now cut each piece into 4 again and you will have 16 cubes from each slice.


Sprinkle the bread with some olive oil and grill them under a hot grill until they become crunchy.


Next, wash the lettuce and place on your plates.


Grill the chicken together with the garlic cloves and rosemary. Once it is cooked through, cook the bacon.


Place the chicken and bacon over the lettuce, next sprinkle the mushrooms and finally top with the bread.


Should you have small forest mushrooms such as finferli I would use those and not the local white variety for this salad. However, if these are not available, then buy some local ones and chop them into small pieces.


Strawberries are back!


I just found some more strawberries for sale, so the Hazelnut Meringue is back on the list this week.
Should you like to order the meringue or any other cake, please do not hesitate to contact me, on concita@demicoli.com or 9943 1000

Spaghetti with Fresh tomato sauce


Tomatoes are at their best this month. With produce being at it’s peak, prices have dropped to €0.50c a kilo making this the right time to make some delicious tomato-based recipes.

Here is one of my family’s favorite recipe; spaghetti with fresh tomato sauce. Forget tinned tomatoes for the next weeks and work with fresh ones. All you need to do is peel them and chop them, then use them in the same way you would use the tinned ones.

Cooking times for fresh tomatoes has to be increased slightly, so you will need to get going a little bit before!

Before I give you this week’s recipe, I would like to share this link: Crying while eating I came across this site by accident, (as with most of the sites I visit on the net!) it’s quite funny and worth a visit!

Here is what you need to make enough pasta sauce to go with 500g of Pasta
2kg beef tomatoes (tadam Catt)
1 teaspoon sugar
Extra Virgin Olive oil
1 garlic clove – finely chopped
Fresh basil – torn into little pieces NOT chopped

Start off by placing the tomatoes in a large bowl and poring boiling water over them. Let them sit for 15 minutes and then discard the water. Now peel the tomatoes and deseed them, chop them roughly and set aside.

In a large deep pan, place the chopped garlic and about 1 tablespoon of olive oil and let the garlic sizzle for a while. Once the garlic softens add the tomatoes and simmer for about 30 minutes until the tomatoes thicken into a sauce consistency.

Now sprinkle in the sugar and cook for a further 10 minutes. Once the sauce is ready, switch the heat off, add the basil leaves and a generous drizzle of olive oil. This addition is important since the taste and vitamins in the olive oil will be transferred into your plate now that the temperature has been lowered.

Once you are ready to serve, add the cooked pasta to the sauce and serve warm with a generous grating of parmiggano reggiano.

Should you like to contact me, please do so on concita@demicoli.com

Feta Salad


Weather is still somewhat undecided but I’m sure that most of you are already thinking of summer BBQs and outdoor entertaining. With this in mind, this week I shall be giving the recipe for a feta cheese salad. It has raw mushrooms added, so if you are not keen on eating raw mushrooms then you could just omit, however, if you’ve never tried them I suggest you give it a try.

As are most of my recipes, this salad is very easy to prepare, and I suggest that you prepare it a couple of hours before serving so that the flavours blend better. This is what you will need to serve 6:
4 Portobello Mushrooms (big flat white ones)
4 Tomatoes
Iceberg lettuce leaves, around 5
1 English Cucumber
200gr Feta cheese
Black olives (pitted if you prefer)
Olive oil
Balsamic Vinegar
Oregano
Start off by washing and draining the tomatoes, lettuce and cucumber. Do not wash the mushrooms but just wipe them clean with some kitchen paper. Next prepare your serving bowl preferable a white one and tear the lettuce placing them at the bottom of the bowl.
Slice your cucumber (with the skin still on) and place them by the side of the bowl, all around the top. De-seed the tomatoes and dice them into little cubes, slice the mushrooms finely and spread all over the lettuce. Now, chop the feta cheese until it is crumbly and form a small ring towards the middle, leaving enough space to place the olives at the centre of the bowl. Using the Danish feta will not give you the same crumble texture as the original greek cheese would give.
In a small bowl, mix 3 spoons of olive oil and 1 spoon of balsamic vinegar together with the oregano or any other herb of your choice. Drizzle it over the salad leaving as many of the mushrooms untouched as possible. Mushrooms that would have the vinaigrette on them will turn dark.
Apart from being tasty, presenting the salad in this way will create an edible centre piece for your table!

June Cakes

June sadly means that my Hazelnut Meringue as well as my Strawberry Flan are no longer on the menu. But fear not my cake buddies, more delicious new cakes are coming soon!

Don’t forget Father’s Day this month celebrated on the 15th June. So if you need any cakes for the day, just email me on concita@demicoli.com

Have a look at the full list of cakes. You can now also find weekly recipes on this page. Leave your comments or start a discussion about any particular dish that you would like to cook or need some tips on preparing!

Did you know? – Sherbet
Every child's favourite tooth-rotter, sherbet, has a surprisingly long culinary history.
Originally, a sherbet was a non-alcoholic drink, usually based on a fruit juice and called 'sharbbt' in Arabic.
The beverage entered Italian cuisine under the name 'sorbetto', which in its French incarnation became 'sorbet'.
During the 19th century the sorbet became an ice to be eaten rather than drunk, and the cheap powdered form emerged in England at the end of that century.Recipes


Watch out for some summer recipes this month in my publications, the Best Buy Supplement will be out with The Times on Wednesday 11th June whilst the E&D Magazine will be distributed with The Times on Saturday 5th July.

Fresh Lemon Sorbet


Honestly, what do you serve after Chinese? Had the in-laws over this weekend for a massive Chinese take-out with the works; whole duck with pancakes, sweet and sour this and that and obviously the crunchy or rather sugary dried beef, loved by all especially the clogged arteries!
I wanted to make a dessert which didn’t have too many steps in, not a lot of baking, done my fair share for this week and with ingredients handy at hand. So I decided to make lemon sorbet.
I had lots of lemons at home and was quite fed up of stocking up on more lemon curd so this recipe was exactly what I needed. I did not include any egg whites in this recipe, so it would be suitable for both children as well as pregnant women.
750ml of water
400g sugar
300ml of fresh lemon juice
You will need to start by placing 750ml of water in a pot with 400g of sugar. Place the pot over a medium heat until the sugar dissolves. In the meantime, wash your lemons and squeeze them. You will need 300ml of juice which is roughly 8 to 10 lemons.
Try keeping the lemons after you squeeze the juice out, they can be used to serve your sorbet in, otherwise you can zest the lemons before squeezing and keeping the zest for later.
Once the sugar has dissolved, add the lemon juice and stir. At this point you can churn the sorbet in an ice-cream machine or else you can place it in a shallow container and place it in the freezer.
Churning should take you around 30 minutes. If you are freezing the sorbet, set your timer for 1 hour. Once your timer rings, whiz the sorbet in an electric blender then place it in the same container and re-freeze. Repeat this process for another 3 times until the sorbet is soft and flaky on the last check.
If you kept the lemon halves, peel the pith out and slice the ends to make your cups stand straight. Make sure that you do not pierce the cups or else the sorbet will run out once it starts to melt.
 

It's Back.....


Finally, my Kenwood is back, so my cakes are available once again! I did enjoy my break, but my oven was crying for something to bake :(

Click Here for my full list of cakes

Watch out for my recipes published everyweek on this page! and, as always, if you need any specific recipe do not hesitate to contact me on concita@demicoli.com

Quick Strawberry Ice-cream


I’m still not sure whether the Strawberry festival we had earlier this month was a good idea!
Prices seem to have risen after this strawberry rampage! So, even though at this time of year you could see me make strawberry jam with the cheaper and not-so-attractive strawberries, this year I am still using them to whole and still shying away from blending and mashing!

If we manage to get some cheaper ones this week, here is a fab and very quick dessert you can make for your friends and family. You could also serve this as dessert with some fresh strawberries on top of each plate to decorate.


Here is what you need:
425g strawberries hulled and washed;
400 ml tinned milk;
some fresh mint leaves.

Chill the tinned milk for a couple of hours preferably overnight before preparing this ice-cream.

Place the strawberries in a blender and blend to a pulp. If you prefer a smooth ice-cream then pass the mixture through a sieve and discard the seeds.


With an electric whisk, beat the milk until it has doubled in volume. With the mixer still on, but lowered to the minimum speed, pour in the strawberry pulp. At this point it is best to try your mixture. Should your strawberries be a little sour add some sugar to taste.


Place the mixture in a freezing container and freeze until the mixture starts to solidify. Now, remove it from the freezer and whip it again. Repeat this procedure another 3 times. Once the ice-cream is completely set, it is ready to serve.


You can prepare this ice-cream in an ice-cream machine. Prepare the whipped milk and add the strawberries as above then churn in your ice-cream machine as per your instruction manual.


You can also substitute the strawberries with any other berries of your choice. Should fresh fruit not be available, I suggest you use the frozen berries and not the tinned ones.


This recipe has been previously published in the Best Buy Supplement, out monthly with The Times.
Should you like to contact me, please do so on concita@demicoli.com

Forced leave!


Oh no, my Kenwood is out of order :( Cannot bake without my baby, so sorry, no orders this week! I guess it's forced leave in a way.....


Not that I am complaining as I need a little break after the Mother's Day orders! I hope that all of you who ordered cakes this weekend enjoyed them.


So, hopefully cakes will be in the oven end of next week, in the meantime, I'm off to Myoka for a much needed massage!!

Warm Mixed Grilled salad

This salad is very easy to prepare and is a welcome change to the standard lettuce and tomato salad! Warm vegetables are ideal to prepare when you are entertaining since they can be prepared in advance and served hot or cold.
You can also serve a small plated quantity of this salad as a vegetarian starter. The vegetables chosen will give you a summer Mediterranean feel and this is what we are longing for during this time of year!
Here is what you will need to serve 4 as a side dish.
2 long aubergines sliced lengthwise
4 long zucchini sliced lengthwise
2 green peppers sliced lengthwise
4 or 5 mushrooms sliced
4 garlic cloves – slit in half
Olive Oil
Salt & pepper
some basil leaves – torn NOT chopped
Start off by slicing the aubergines and sprinkling them with salt. This will get rid of the excess water within the vegetables. They should be left to stand for at least 2 hrs.
Next heat a griddle pan until smoking hot and place the vegetables for a couple of seconds until the slices have been charred on both sides.
Now place the vegetables together in a bowl and stir them together with a very generous helping of olive oil. Season with salt and pepper and allow the salad to rest for a couple of minutes before serving. You can also chop some fresh red chili if you wish to make this dish a little spicier!
This recipe has been previously published in the Best Buy Magazine, out monthly with The Times.
Should you like to contact me, please do so on concita@demicoli.com

May Newsletter


May is still the month of strawberries and with Mother’s Day celebrated on the 11th May I am introducing a new cake. My Hazelnut Meringue filled with strawberries and cream and topped with chocolate coated strawberries measures 26cm and is sold at €16.00. Watch out for the photo of this cake on my blog over the next week, I hope I’ll manage to take a photo before it’s all eaten next time I’ll make it!

Don’t forget to visit Kelina’s Jam stand this weekend 3rd & 4th May, at the San Anton Garden’s Spring fair. For more info on the jams email kelinafenech@hotmail.com

Have a look at the full list of cakes on my blogspot. You can now also find weekly recipes on the blog. Leave your comments or start a discussion about any particular dish that you would like to cook or need some tips on preparing!

Watch out for some recipe you can prepare with your children, out tomorrow in the E&D magazine distributed with The Times on Saturday 3rd May.Also, look out for some super quick entertaining ideas in the Best Buy Supplement out with The Times on Wednesday 14th May


Did you know? – Popcorn

  • Popcorn 'pops' because, upon heating, the starch in certain maize kernels expands and bursts through the outer skin.
  • Archaeologists discovered corncobs and kernels in New Mexico which had been popped over 2000 years ago; although, as yet, no evidence of early cinemas has been found.Recipes


    Feeling adventurous this week, why not try making some Banana Ice-cream or a quick Noodle Stir-fry. For more recipes view my blog or www.di-ve.com

    Should you like to contact me, please do so on concita@demicoli.com

Banana Chocolate-chip Ice-cream

I am testing new cake at the moment which is leaving me with plenty of egg yolks in the fridge. and when life gives you egg yolks, i make ice-cream! last week i made some delicious strawberry ice-cream on the suggestion of my friend and fellow foodie but this week having had some terribly ripe bananas to get rid of, I made some banana ice-cream.

The best thing about this ice-cream and anything else involving fresh bananas is that they are available all the year round so you can make this delicious dessert whenever you feel like even in the middle of winter.
I have an ice-cream machine which makes the process easier but, if you don't have an ice-cream machine, you can still make this recipe a try.
Here is what you need to make about 2l tub of ice-cream
3 ripe bananas
1 tablespoon lemon juice
150 sugar
5 egg yolks
200ml milk
250ml double cream
100g dark chocolate - chopped
Start off by blending the bananas. Only they are mashed to a pulp, stir in the lemon juice immediately. Place the bananas together with 1 tablespoon from the weighed sugar into a pot and place over very low heat. Once the sugar has melted and the bananas warmed, switch the heat off and set aside.
In another pot, heat the milk. Whip the egg yolks and the sugar in a bowl and once it has doubled in volume, add the warm milk. Return the milk and egg mixture to the cook and heat slightly until the mixture coats the back of your spoon and leaves a mark should you make a line with your finger.
Do not leave the milk and egg mixture at any point. This process is very short and you want to avoid having scrambled eggs.
Now take the milk off the heat and pour it into a large pot. Stir in the bananas and allow the mixture to cool completely. Then place the bowl in the fridge and chill for about 30 minutes.
Once you are ready to churn your ice-cream, beat the double cream and fold it slowly into the banana mixture. Place the ice-cream into your ice-cream machine and churn.
Once the ice-cream starts to thicken, add the chocolate pieces. Make sure that these pieces are chopped but hand into small chunks. Do not grate or blend the chocolate. This will make your chocolate too small to enjoy.
Should you like to contact me, please do so on concita@demicoli.com

Marks & Spencer Food

I just came back from a very inspirational trip to the Marks & Spencer outlet in Baystreet and boy was that fun!

They are sponsoring my next article in the Best Buy supplement out with The Time on Wednesday 14th May, so I had to go to collect ( or rather choose) some ingredients.

When it comes to quality convenience food I think they are tops! they have a very wide selection of food which is ready to serve in minutes and with absolutely NO prepations, you just open the packet, warm and serve!

This is obviously not what I will be doing for the Best Buy supplement but the food will be superfast to prepare. Just imagine, they have a marinade which only takes 5 minutes as against the normal marinades that take a couple of minutes or hours to do their trick.

I do suggest you give them a visit!

Chickpea, Bean & Carrot Soup


Weather still hasn’t settled and with the heat-wave we had last week, I’m sure most of you thought that summer was here. Well for those of you who still need to get in shape for the beach, there is still time!

This week I am giving you a recipe for a delicious soup that is also low in GI. The beans and chickpeas help you feel fuller for longer so add them liberally to your dishes!

Here is what you need to serve 4
50g dried Butter beans or cannelini
50g dried chickpeas
1Kg carrots
1 large onion
1 tablespoon Kunserva – Maltese tomato paste
1 teaspoon chicken stock granules

Start off by soaking the chickpeas and the beans for (if possible) a couple of hours before you start cooking. Should you be preparing this dish in the evening try to soak the beans at least in the morning or even the night before. Soaking will drastically reduce your cooking time. Make sure that you use a large bowl and add a lot of water for the bean and chickpeas to absorb.

To make the soup, place the onions and a little oil or some water if you want a fat free soup in a pot and allow the onions to cook. Once the onions have softened, add enough water to fill your pot about three-quarters full. Add the beans and the chickpeas and slice in the carrots. Place the kunserva and the stock granules and bring the pot to a boil.

Simmer the soup for about 1 hour until the beans and the chickpeas can be squashed when pressed between your fingers.

Blend the soup in a liquidizer and serve warm.

Should you like to contact me, please do so on concita@demicoli.com

Lunch for one - Quick Stir fry noodle


When you get into a fix on what to cook for a quick lunch or dinner for 1, this dish comes together in a matter of minutes and is super healthy. Containing good quantity of vegetables, this dish is suitable for vegetarians, however if you must add meat, then I suggest you add chicken slices.


Here is what you need to make this dish for 1:
125g medium egg noodles
1 medium carrot, peeled and cut into batons
1 medium marrow cut into batons
2 mushrooms thinly sliced
Baby corn
About 8 leaves of swiss chard (Selq) now in season
1 medium fresh garlic, chopped
1 vegetable stock cube
1 teaspoon ground ginger
1 tablespoon Rice Wine or Sherry
1 tablespoon Sesame oil
1 tablespoon olive oil

Start off by preparing the vegetables. Chop the garlic into thick strips and set aside. Next wash the chard and chop the bottom thick stalk into 2cm chunks.

Peel the carrots and cut it into strips about 4cm long and slice the mushrooms.

Now in a small bowl or a cup, place the stock cube and dilute it with a little water. Add the rice wine and the ginger and stir.

Once your vegetables are cleaned and prepared, fill a pot with hot water and once it boils cook your noodles. In the meantime, place the garlic and olive oil in a pan and place it over a medium heat. Next add the stalks of the chard and cook with a little bit of the stock/wine mixture.

Now add the carrots, the chard leaves and stir. Once the noodles are ready to be drained, add the mushrooms, marrows and the corn and stir in the drained noodles all in the pot.

Once the noodles have been properly stirred through, serve the noodles immediately. If you have any leftovers, place these in the fridge. This dish makes a great packed lunch for the office as it is easily heated in a microwave.

This recipe has been previously published in the Best Buy Magazine, out monthly with The Times.

Should you like to contact me, please do so on concita@demicoli.com

April Newsletter


I hope you had a lovely Easter and possibly also had some time to relax! This month with the lovely sweet local strawberries in season I am introducing the Strawberry flan back on the menu.


Have a look at my full list of cake if you are after something different.


As you might have noticed, I am now having a weekly recipe on this page and hopefully in the months to come I will also have different discussions going about different dishes.


In the meantime, you may leave your comments or start your own discussion here on any particular dish that you would like to cook or need some tips on preparing!


More recipes this month in the Best Buy Supplement out with The Times on Wednesday 10th April. This issue is filled with recipes using seasonal vegetables.


As I do every month, here is the curiosity section that I know most of you enjoy reading!

Did you know? – Berries


  • The strawberry probably got its name originally from the Anglo-Saxon word streawberige, which means “spreading berry.”


  • Most raspberries are red, but some varieties are white, yellow, or black. Raspberries may have been named after a 16th century French wine called raspis, they used to be called hindberries.


  • Blackberry juice was used to dye cloth navy blue and indigo.


  • The gooseberry is called the “mackeral currant” in French because gooseberry sauce is served with mackerel, a type of fishRecipes


Basic Pizza Dough


Making your own pizza dough is much easier than you think! The great thing about it is that there are no preservatives and that it can be done in a short time.  

Make sure to keep a packet of instant yeast in your cupboard (which will keep for months) and you can make pizza any time. Here is what you need to make enough pizza for 6 people as a main course

1 kg plain flour, possibly use 00 type
1 sachet x 11g instant yeast
1 teaspoon salt
2 tablespoon olive oil
around 500ml luke-warm water - add this slowly as you might require less.

Sift your flour into a very large bowl. Add the salt on one side of the bowl and the yeast to the other side. Never mix the two as it will hinder the yeast activity.

Next add the olive oil and whilst you have the stand mixer running pour in the water.  Make sure to add this slowly as you might not need to use all the 500ml.

If you are mixing the dough by hand, then ideally you could stir with one hand and pour in the water with the other. If not, just add the water and stir well after every addition checking whether the dough needs more water before adding.

When you think you have enough water to achieve a wet dough, stop adding water.
If you feel that you have added too much water, just add a tablespoon or 2 of flour.  A wet dough will give you a better pizza crust.


Once your dough is done, let it rest until it doubles in volume. This should take about 1 hour.

If you are really pressed for time, I suggest you warm the flour in a low oven or for a few seconds in the microwave before you make the dough. This will speed up the process.


Once your dough has nicely risen, place it on a floured surface. Cut the dough into 6 pieces.

Next roll the dough out into the shapes that your baking dish dictates. This could be round or rectangular depending on the oven dish you are using.

Ideally you would let the dough rest in the dish before adding your pizza ingredients, but if there is no time for this, dive straight piling your ingredients.


I like to brush my baking dish with oil or cooking spray before sprinkling the base with a layer of Semolina.

If you cannot find Semolina, just add some flour.

Once your ingredients have been added, bake in a hot oven until the dough is golden.
I suggest you preheat the oven to the highest setting and then lower the temperature to 180 C once the pizzas are added.

The regards to topping, the simpler the better.
Try a combination of Tomato purée or chopped tomatoes topped with sliced onions and olives. Or else mushrooms and ham. Always on a base of tomatoes and topped with mozzarella cheese, oregano and some olive oil once it is out of the oven.

I also like to bake a plain pizza with just the tomato sauce and then add torn pieces of mozzarella di bufala once out of the oven. Again, don't forget a drizzle of olive oil. 

Easter Figolli


Figolli are essentially almond pies done in different shapes to be eaten on Easter Sunday. Originally decorated with fondant, now-a-days you may also find ones decorated with chocolate.
Although modern additions to Easter such as chocolates eggs and the Easter bunny can be found in most shops, Figolli are still very popular.
I like to prepare the dough the night before, this gives it time to rest as well as it reduces your preparation time on the day. Here is what you will need:
Makes 10 large figolli
For the dough:
800 gr. Plain flour
400 gr. sugar
250 gr margarine
4 eggs
1 teaspoon vanilla essence
3 teaspoons baking powder

For the filling
600 gr. Sugar
600 gr. Ground Almonds
4 to 5 egg whites depending on the size

Start off by preparing the dough, sift the flour into a large bowl and add the baking powder. Now, add the margarine and rub it in with your hands until it has been completely dissolved into the flour and you are left with a sandy mixture. Now, add the sugar and vanilla and make a well in the middle. Add the eggs and mix the ingredients together to form dough. Set it aside to rest on a floured surface or place it in the fridge overnight.

For the filling, place the ground almonds and sugar together in a bowl and add the egg whites a little at a time mixing after every addition. Once the almond turns into a paste, your filling is done. You should be able to hold the almond paste in your hands and shape it just like you would with pastry.

To prepare the figolli, just roll out the dough to about 0.5 cm in thickness and cut two identical shapes. Place a layer of filling on one of the shapes leaving a boarder around the edge of approximately 1 cm. Make sure not to press the filling too much when spreading since this will cause your pastry to lose its shape or widen and the top (identical) layer will not fit.

Now brush the edges with a little water or apricot jam and place the second shape over it. Bake in a pre-heated oven at 180C for approximately 30 minutes or until the figolli have nicely browned.
Repeat the process until you would have used up all your dough.
Coat your Figolli with melted chocolate or icing and decorate with silver balls.

Kwarezimal


Easter is celebrated next Sunday the 23rd. During this Christian period, no sweets should be consumed, however, together with the Caramelli tal-Harrub (carob sweets), it is said by fasters that Kwarezimal or Quarezimal are the permissible sweets during the Lenten period. Figolli, which are essentially an almond pies done in different shapes are to be eaten on Easter Sunday. Modern additions to this feast are chocolates eggs and the Easter bunny which can be seen on most Easter decorations.
Kwarezimal need a little more attention then the Figolli to make. The difference between a complete disaster and perfection can be a few extra drops of water added to the mixture so work slowly!
Here is what you will need:
350 gr. Ground brown almonds (not blanched) with the skin still on
350 gr. sugar
2 ¼ tablespoons golden syrup
4 teaspoons cocoa
2 teaspoons Baking powder
½ tablespoons mixed spices
Lemon Rind
200 gr. plain flour
A pinch of salt
100ml of water (room temperature)

Place all the ingredients, excluding the water, together in a large bowl or electric mixer and stir until all the ingredients are incorporated.
Now add a tablespoon of water at a time and mix well after every addition. Do not be afraid to mix on a relatively high speed, no harm can be done by over mixing it. Make sure to mix for about 2 minutes after every addition as the water take long to mix through the ingredients.
Once a dough consistency is achieved, take the mixture out of the food processor and allow it to rest for 30 minutes.

In the meantime, heat your oven to 160C and line your flat baking with baking paper. Now shape your kwarezimal by hand into rectangles approximately 10 cm long and 3 to 4 cm wide the height should be approximately 1 cm.
Bake the kwarezimal for 10 / 15 minutes, they should still be soft once you remove them from the oven, but don’t worry, they will harden up on cooling.
Now for decoration, heat up some golden syrup until it is runny. Brush the syrup on top of the kwarezimal then sprinkle some crushed nuts over it.

Baked Tortellini


Thank god for 1Kg packets of tortellini; it makes this dish so much more convenient! Baked tortellini can be very filling so make sure to serve these when you are really hungry or if you are planning a special dinner or lunch. There is a wide variety of tortellini available on the market and you can choose any filling you prefer.

I like using the meat ones for this dish as they are easier to find and come in large packs. If you are using fresh tortellini, then I suggest that you boil them for very little as they would have cooked too much by the time they come out of the oven.
In fact it is best to use the dried variety for this dish!


Here is what you need to serve 4
700g tortellini
1 x 400g Tinned chopped tomatoes
2 garlic cloves
150g cheese
200g mushrooms
200g cream
1/2 cup milk
1 egg
Salt & pepper

Start off by boiling the tortellini for 5 minutes. They should be taken off from the heat and drained as soon as the 5 minutes are up.

In the meantime, place the garlic which needs to be chopped finely into a pan with a little bit of oil and fry slightly. Add the tomatoes and 1 cup of water and cook over a gentle heat.

When the tortellini are ready, drain them and place them back into the pot. Now add the tomatoes which must have not dried up, the cream and the mushrooms.

Now, chop or grate the cheese (I like placing it in a blender). The cheese must not be grated cheese; you can mix some cheddar, Romano and some other cheese. You can also clear up your fridge from any ends left!

Leave about 50g aside and mix the rest of the cheese into the tortellini. Add the milk and the egg and spread it into an oiled baking dish.

Cook the tortellini for about 10 or 15 minutes at 150C. It is best to let them rest for at least 10 minutes before serving.

Should you like to contact me, please do so on concita@demicoli.com

Pasta with Calamari

With sunny days becoming frequent and spring just around the corner, I changed my menu at home this week and decided to add a little bit more fish! So this week I prepared a nice plate of spaghetti with a calamari sauce. Here is the recipe for the sauce. I prefer to serve this with spaghetti, but you can use any pasta you like.

Serves 4
1 large calamari – about 30cm in length
1 medium onion sliced thinly
1 x 400g tin, chopped tomatoes
2 tablespoons kunserva
2 teaspoons anchovy paste
150g green & black olives, pitted and chopped
1 teaspoon capers, chopped
1 heaped teaspoon dried oregano
1 teaspoon butter

Start off by cleaning the calamari, or ask you fishmonger to do so. Once it’s cleaned, slit a knife across once side of it and open it up into a butterfly. Now cut the calamari into cubes about 2cm x 2cm.

In a pot, place some olive oil and add the onion. Once the onion softens, add the calamari and cook for about 2 minutes.

Now add the kunserva (tomato paste) and the chopped tomatoes and season with the anchovy paste. Add the capers, olives and about 1 cup of water and simmer for 15 minutes. Now add the oregano and stir in the butter and cook the sauce for another 30 minutes or until the sauce has reached the thickness required.

I prefer to serve a thick sauce in this case as it coats the pasta beautifully.

You can allow the sauce to simmer for longer if you wish. Once the pasta is cooked, stir the pasta into the sauce and serve.

You can also prepare the sauce in advance and freeze it.

Should you like to contact me, please do so on concita@demicoli.com

Beef Stew


The past few days have really been cold and since i was stuck at home taking care of my little girls with little time on my hands to cook, i decided to make what i call a one-pot meal. This is basically putting everything into 1 dish and letting it simmer/cook!

This week I made beef stew which was also ideal since the weather was so cold that you really felt like something hearty to warm you up before you tuck into bed.
Here is what you need to serve 4 :

500g - 1Kg beef rump. ask your butcher to cut it into chunks
2 tablespoons kunserva (Maltese tomato paste)
1 large onion
2 carrots, peeled & chopped into slices
2 medium potatoes, diced
1 handful peas
1 teaspoon mixed spices
1 beef cube - crumbled
700 ml hot water
Start off by browning the beef in a pot. Stir the beef chunks until they are brown on the outside.
Next add the thinly sliced onion and stir. Make sure the onions are cooked before adding any other ingredients.
Next add the kunserva, vegetables, spices, cube and water. Cover the pot until it reaches a boil then lower the heat, tilt the lid to one side to allow the steam to be released and allow the stew to cook for a further 1hr.
Mix the pot occasionally to make sure that the ingredients do not stick to the bottom of the pan. If the stew is too thick for your taste, add a little more water and stir. You cannot overcook the meat, so don’t worry too much about the cooking time. The more the meat cooks, the softer it will become.
I like to serve this stew on a bed of rice. If you want something a little more rustic, then serve it with a loaf of Maltese bread!